# Establishing a connection within Magento
After the connection has been established in Acumatica, the connector must be established in Magento.
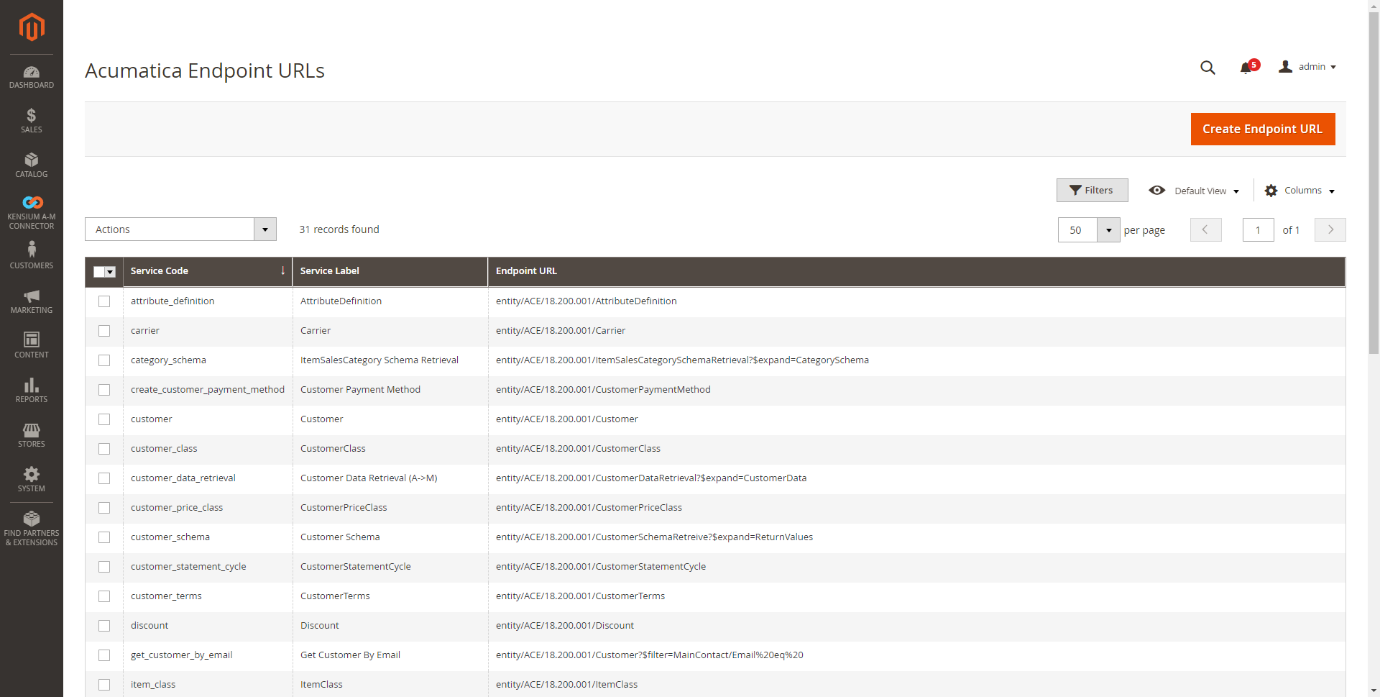
# Viewing the Acumatica endpoint URLs in Magento
Endpoint URLs are visible for a user to determine the destination of data synced from Magento to Acumatica. These endpoints utilize Acumatica’s API framework to determine the direction of calls made from Magento to Acumatica.
To view these endpoints, navigate to the Kensium A-M Connector workspace in Magento and click Acumatica Endpoint URLs.
Notes
It is not advised to modify URLs without the support of an implementation specialist. Endpoint URLs are added by default upon installing the package. They should be modified only if a customization is present or being added.
# Basic Configuration in Magento
To configure the connection in Magento, navigate to the Kensium A-M Connector workspace in Magento and click Basic Configuration
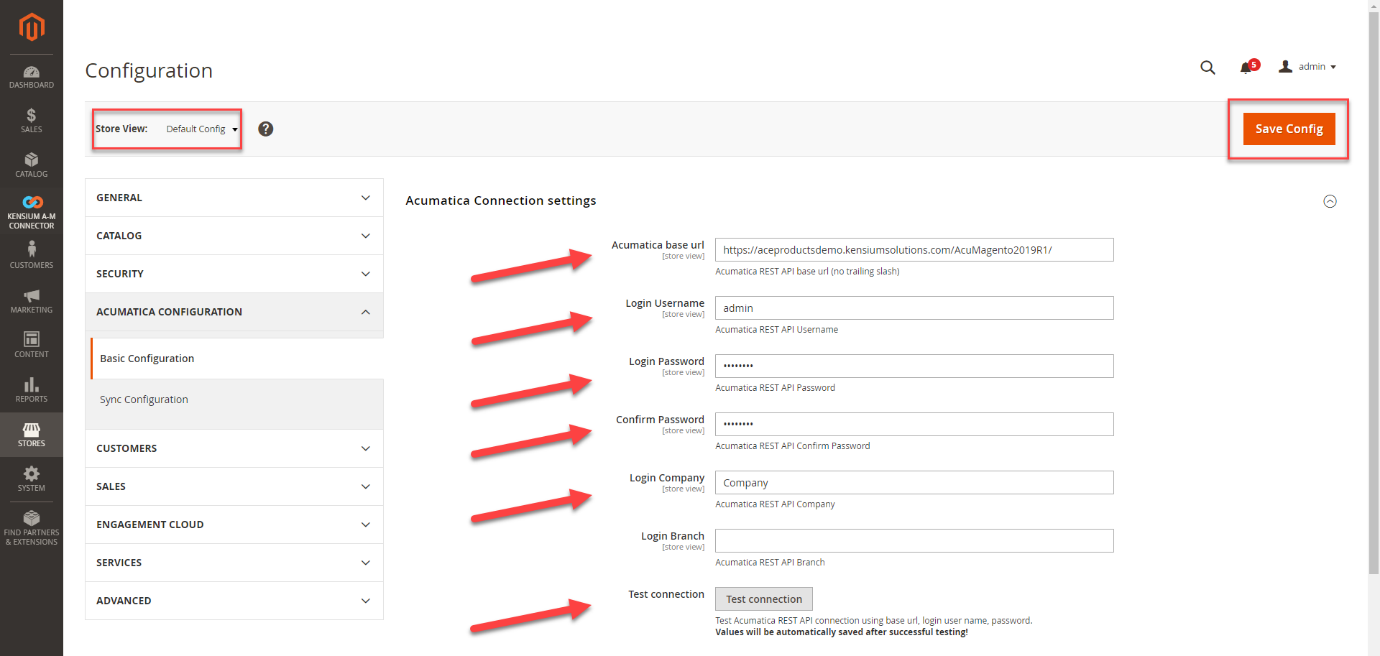
Select a Store View
- The Store View indicates which website (in Acumatica terms, which branch) the configuration will affect. If the configuration is applicable to all websites, and thus stores and branches, active on Magento, select Default Config. Otherwise, select the website or store view that is specific to the configuration that is being completed.
Enter the Acumatica Base URL.
Enter the Login Username.
Enter and confirm the Password.
Enter the Login Company.
Click Test Connection.
- A message will appear if the connection is successful.
Click Save Config.
The Logging section of the Basic Configuration page allows a user to select the actions that can be logged during data exchanges between Acumatica and Magento.
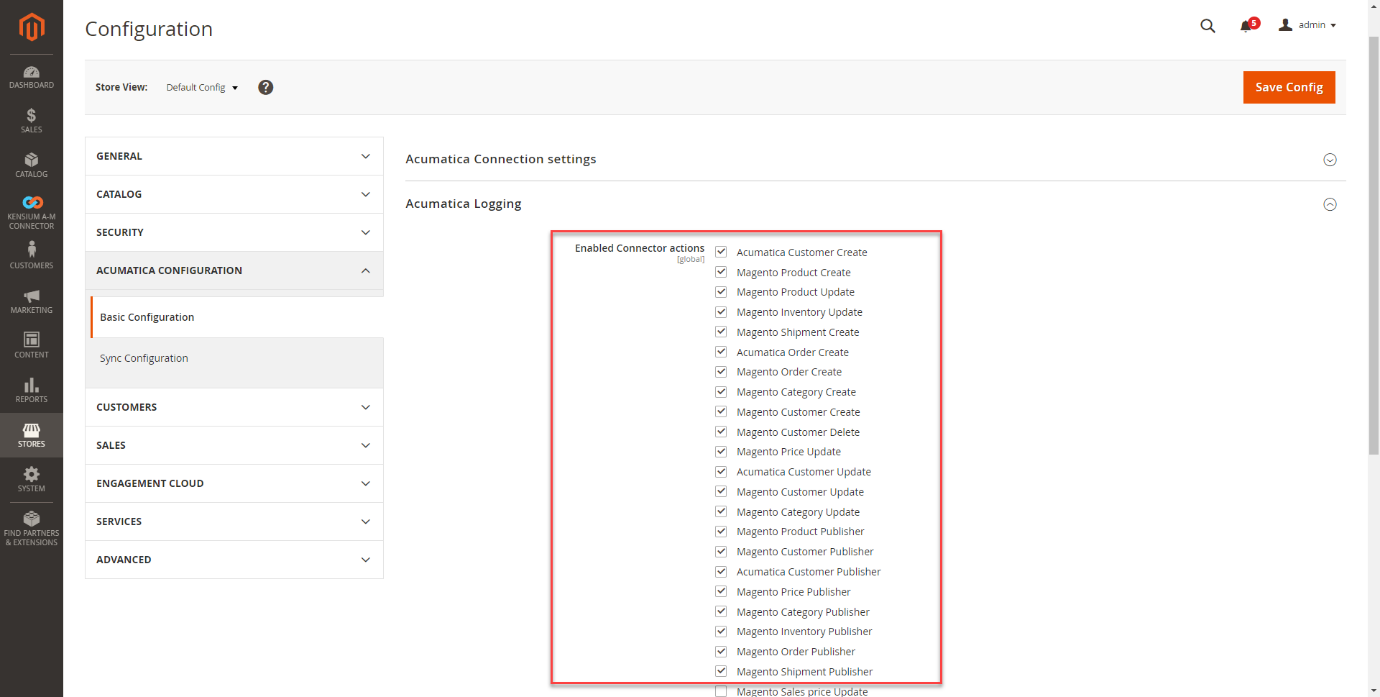
Toggle the Logs that are needed.
Enter a value for the Log Entry Lifetime, days.
Enter a Log Cleaning Frequency.
Select the Show in System Messages preferences.
Click Save Config.
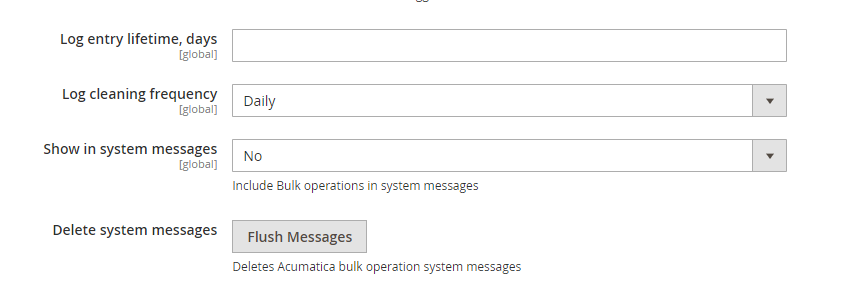
At the bottom of the screen there is an option to Flush Messages. This action will delete all log data if necessary.
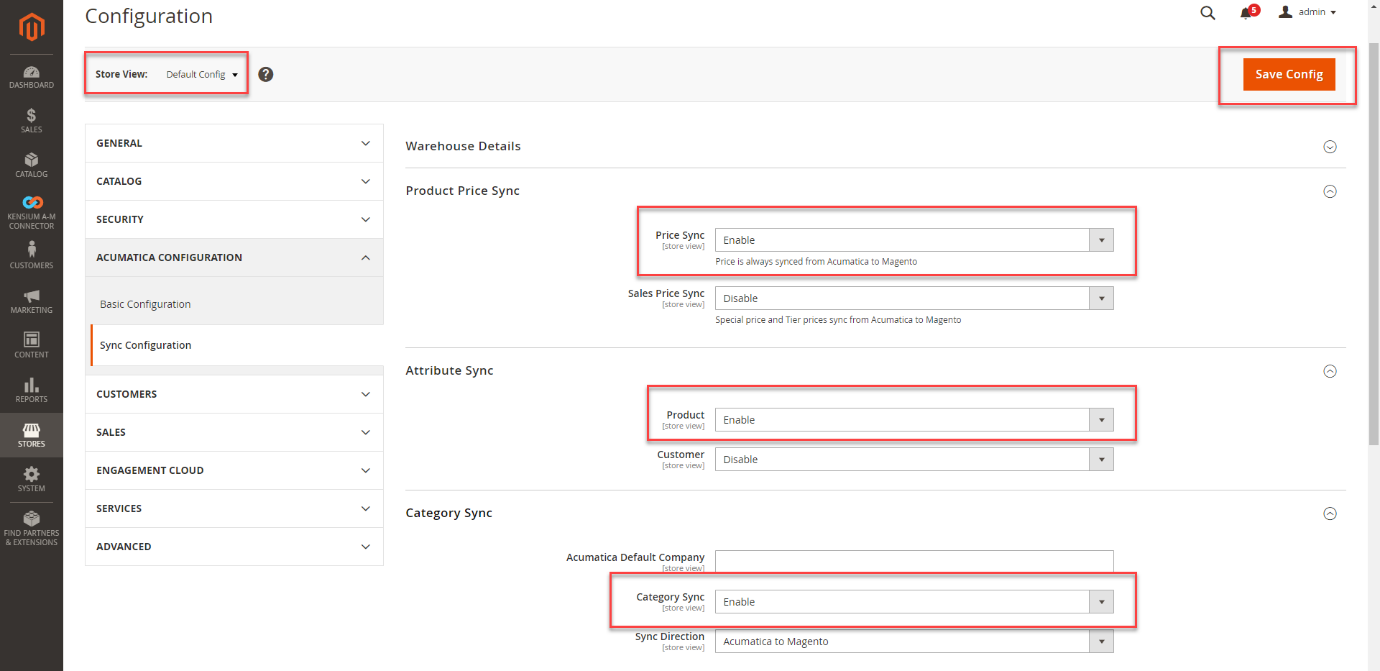
# Sync Configuration in Magento
Sync Configuration in Magento allows a user to enable syncs between Acumatica and Magento. Navigate to the Kensium A-M Connector workspace in Magento and click Sync Configuration.
Select a Store View.
- The Store View indicates which website (in Acumatica terms, which branch) the configuration will affect. If the configuration is applicable to all websites, and thus stores and branches, active on Magento, select Default Config. Otherwise, select the website or store view that is specific to the configuration that is being completed.
Toggle a Sync to enable to enable the sync for a particular sync.
Select a Sync Direction for the sync.
Click Save Config.
Repeat these steps for each sync criteria that are necessary for syncs.
# Sync Rules
Inventory management involves stocking and ordering, as well as actions to plan, execute, record, assess, and improve the process. This activity is now quicker and more trackable owing to the Magento module, where the newly added Sync Rules feature allows businesses to efficiently manage their stock across warehouses and multiple stores.
Sync rules can be customized for all Entities. Thus, businesses can now set specific conditions to carry out specific actions.
# Add Custom Rules and Actions
Only an Admin user can configure a New Customized Rule in Magento to Acumatica connections.
- Sign in to the Kensium Commerce application at [https://magento244qa01.kensiumcommerce.com/admin_1edrup/(https://magento244qa01.kensiumcommerce.com/admin_1edrup/)
- Select Kensium A-M Connector in the left navigation
- Click Sync Rules under Configuration

- The application displays the Sync Rules page. Click Add New Rule to create a new customized rule

- The admin user is now directed to the New Rule page, where it gathers all required information to create a new rule in the following sections: a. General Information b. Conditions and c. Actions
# General Information
In this section, the admin user must provide the basic details of the new rule.
| Field Name | Description |
|---|---|
| Rule Name | Enter the rule name that best describes its action. |
| Rule Description | A summary of the rule outlining its usage or it's specific conditions to carry out specific actions. |
| Entity | An order entity is associated with one or more customer order lines. Currently, Kensium is implementing Order Entity only. By default, the value in this field is set to “Order”. |
| Direction | The act or an instance of instructing the rule based on the condition that applied. By default, the value in this field set to “Magento to Acumatica”. |
| Priority | This is the condition supplied to the rule to be treated as most essential than other rules. Kensium Commerce application will examine each rule's criteria based on priority, and if any rules fail, application will dismiss the subsequent rules. If the value is set to '1', it indicates that it is the top priority rule to execute. |
| Active | Toggle it to ‘Yes’ to activate and execute the rule based on its priority. Toggle it to ‘No’ to deactivate and dismiss the execution. |

# Conditions
The conditions define how to test the data that provided to a rule. Each test compares the values in your data and provides the result that is either 'True’ or 'False' and then it does the specified actions.

# Actions
The rule action defines on what to do when a rule is executed. It instructs Kensium Commerce application on when to respond to a web request that meets the conditions specified in the rule.

If a new product is added later in Acumatica, the admin user must perform Order
# Scenarios
# Scenario 1:
| Condition | Action |
|---|---|
| Stop automated order resync when “CustomerID” is empty and send an email alert to admin or specified recipients in the rule. | In this scenario, you would extract the database-defined attribute “CustomerID” and add the sync exception as "CustomerID cannot be empty" to halt the automatic order resync. You would also add the admin email address or specific recipients to send an email notification when the condition is executed. |
Stop automated order resync when CustomerID is empty and send an email notification.

# Email sent to admin and specified recipients

# Scenario 2:
| Condition | Action |
|---|---|
| If error message contains (Zip code not found) | In this scenario, Zip Code is validated with third party service app (Example – WebKul Zipcode Validator) and if the zip code is not found, you must restrict the order sync by adding a custom rule to avoid publishing to the queue repeatedly. You should also include an order comment to describe the reason for the failure. |
# Stop automated resync when customer Zip code is not found

# Scenario 3:
| Condition | Action |
|---|---|
| If error message contains (Bank card details are mismatched or invalid) | In this scenario, validate customer ‘card details’ with any third-party service app (Example – Bin Checker) and if the card details are invalid, set the action to retry the order/data sync automatically. |
# Retry order sync when customer bank card details are mismatched or invalid

# Reports
The Magento website will send you an email as a notification along with a failure log report that includes information about the module and the total number of problems that were encountered.

# Mapping Warehouses
# Add Custom Rules and Actions
Acumatica inventory values are modified with reference to store values supplied on the Setup settings page.
