# Mapping in Magento
When Acumatica data is prepared for syncing, the data paths must be mapped based on attributes and fields established in Magento. This requires the creation of additional schema and attributes in Magento.
# Mapping Product Attribute Schema
Product Attribute Schema must be mapped in order to ensure product data can be moved from Acumatica to Magento. Acumatica attributes are considered metadata and must be mapped prior to syncing products.
To begin, select an attribute that has been added to an item class that is enabled for Magento sync in Acumatica. Navigate to the Magento Connector workspace in Acumatica and select Product under the Schema Management section.
Click Refresh Schema.
- The attributes will refresh successfully with a green checkmark.
Toggle the Active box next to the attribute that must be mapped.
Click Save.
To view the successfully synced attribute, navigate to the Stores workspace in Magento and select Attribute Set. Attribute Sets are equivalent to Acumatica item classes.
Click the Attribute Set (item class) that the Acumatica attribute is assigned to.
In the Groups section, scroll down to the Acumatica folder.
The attribute will appear in the Acumatica folder.
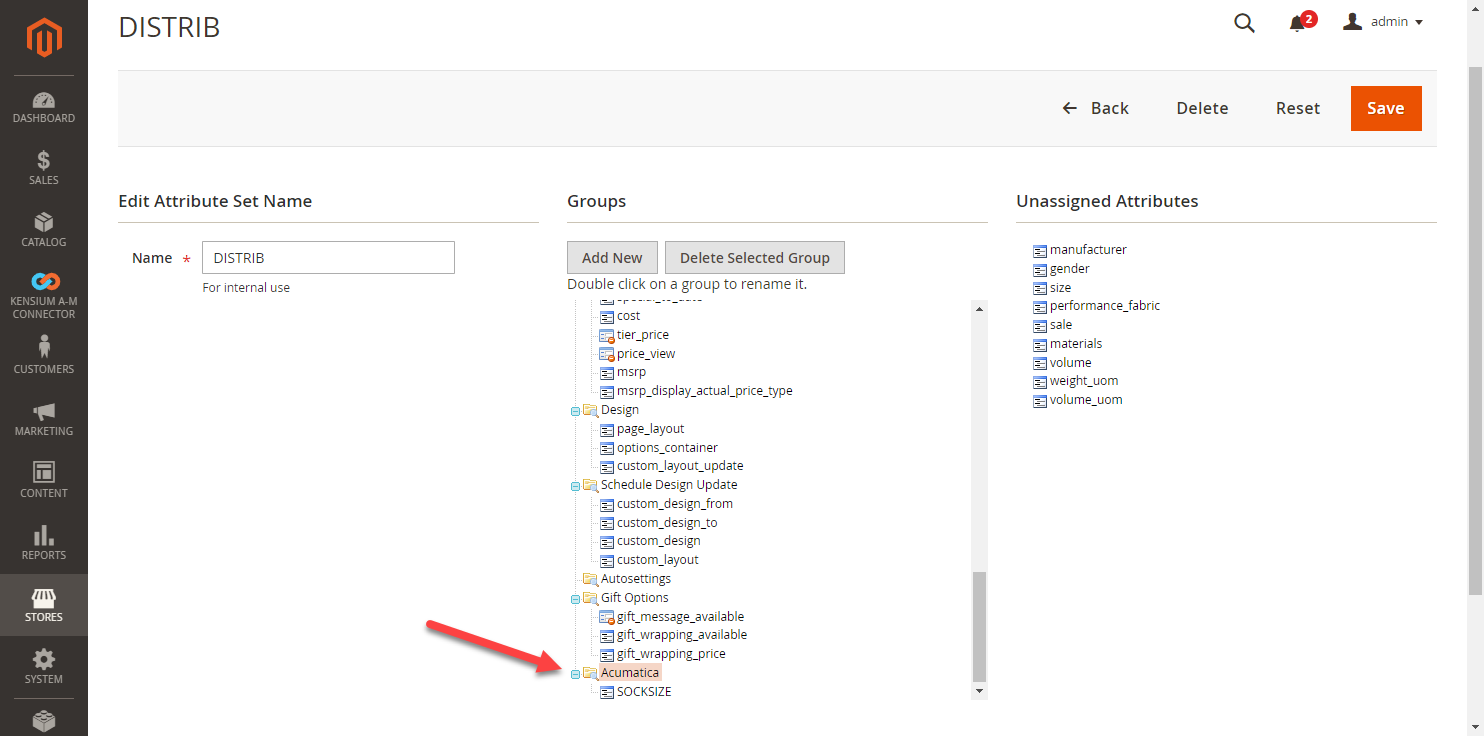
Default Magento attributes will appear in the General folder. It is important to note that the connector will not adjust any existing attributes located in attribute sets in Magento. If the attribute appears in the Unassigned Attributes list, the attribute may be dragged and dropped into the Acumatica folder.
Now that the attribute has been assigned to the Attribute Set, the attribute can be made and mapped in Magento for syncs. Navigate to the Kensium A-M Connector workspace in Magento and select Product in the Mapping section.
Select a Store View in the top left hand corner.
Click Update Schema.
- If the Magento Product Attribute already exists for the Acumatica Product Attribute, skip to step 8.
Click Get New Attributes
- The list of unmapped attributes from Acumatica will render.
Click Create next to the Acumatica attribute that will be made into a Magento attribute.
Under Attribute Properties
Enter a Default Label
- This is the display name of the attribute.
Enter a Catalog Input Type for Store Owner
- This will update the interface of the options for the attribute.
Enter a Values Required option.
- This will determine whether the attribute is a required field.
Under Advanced Attribute Properties.
Enter an Attribute Code.
- This is an internally used code for attributes.
Enter a Scope.
- This will designate where the attribute will be visible.
Click Save Attribute. The Magento Attribute will now be created based on the information from the Acumatica Attribute and appear in the Magento Product Attribute column of the Product Attribute Mapping page.
Click Update Schema.
Click Map Product Attributes.
Select the Magento Product Attribute.
Select the Acumatica Product Attribute.
Click Save.
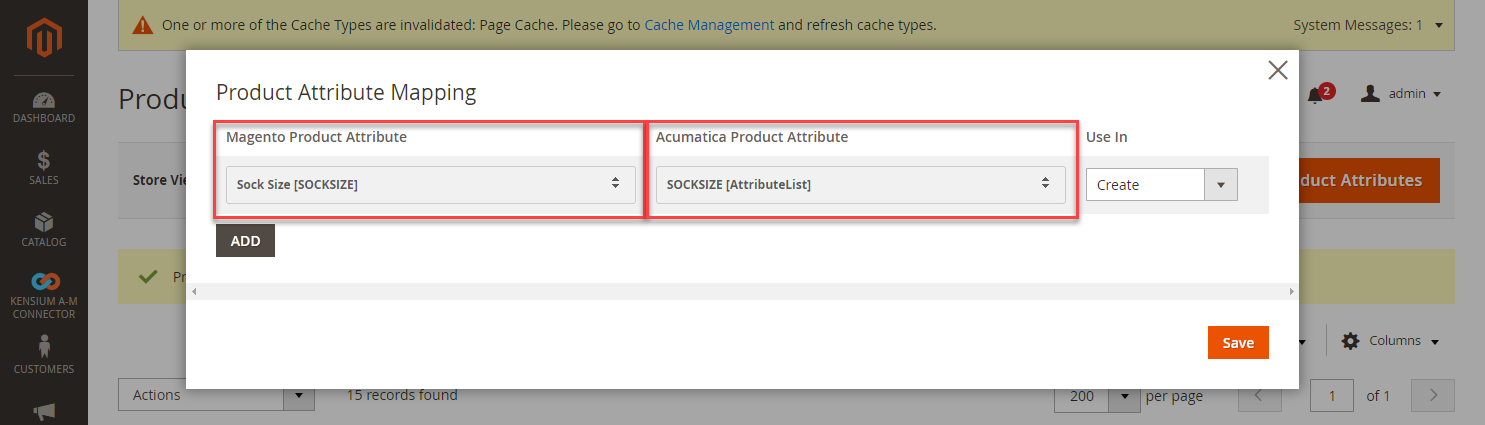
The attribute has now been mapped.
# Mapping Customer Schema
Customer schema must be mapped to ensure that customer data is properly syncing between Acumatica and Magento. To begin, navigate to the Magento Connector workspace in Acumatica and select Customers under the Schema Management section.
Click Refresh Schema.
- The attributes will refresh successfully with a green checkmark.
Toggle the Active box next to the attribute that must be mapped.
Click Save.
Next, navigate to the Kensium A-M Connector workspace in Magento and click Customer under the Mapping section.
Select a Store View in the top left hand corner.
Click Update Schema.
- If the Magento Customer Attribute already exists for the Acumatica Customer Attribute, skip to step 8.
Click Get New Attributes
- The list of unmapped attributes from Acumatica will render.
Click Create next to the Acumatica attribute that will be made into a Magento attribute.
Under Attribute Properties
Enter a Default Label
- This is the display name of the attribute.
Enter an Attribute Code
- This is an internal documentation of the attribute.
Enter a Input Type option.
- This is the type of attribute that has been created in Acumatica (combo, multi combo, etc.).
Under Storefront Properties.
Enter a Show on Storefront Option.
Enter a Sort Order.
- This will designate where the attribute will appear in conjunction with other attributes if visible on the storefront.
Enter a Forms to Use In.
- This will designate where the attribute will appear.
Click Save Attribute. The Magento Attribute will now be created based on the information from the Acumatica Attribute and appear in the Magento Customer Attribute column of the Customer Attribute Mapping page.
Click Update Schema.
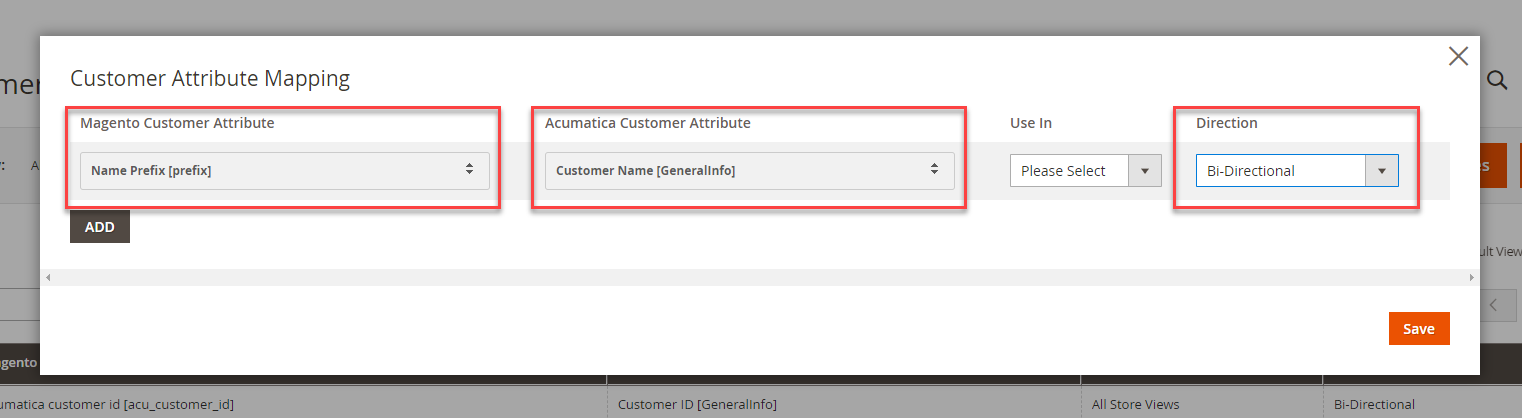
Click Map Attributes.
Select a Magento Customer Attribute.
Select an Acumatica Customer Attribute.
Select a Direction.
- This will allow a user to determine the direction of metadata syncs for individual product attributes.
Click Save.
The attribute has now been mapped.
# Mapping Category Schema
Category mapping involves the information located in the eCommerce tab of Acumatica that renders with the utilization of an eCommerce connector. To begin, navigate to the Magento Connector workspace in Acumatica and select Categories under the Schema Management section.
Click Refresh Schema.
- The attributes will refresh successfully with a green checkmark.
Toggle on the Active box next to the attribute that must be mapped.
Click Save.
Next, navigate to the Kensium A-M Connector workspace in Magento and click Category in the Mapping section.
Select a Store View.
Click Update Schema.
Click Map Category Attributes.
Select a Magento Category Attribute.
Select an Acumatica Category Attribute.
Click Save.
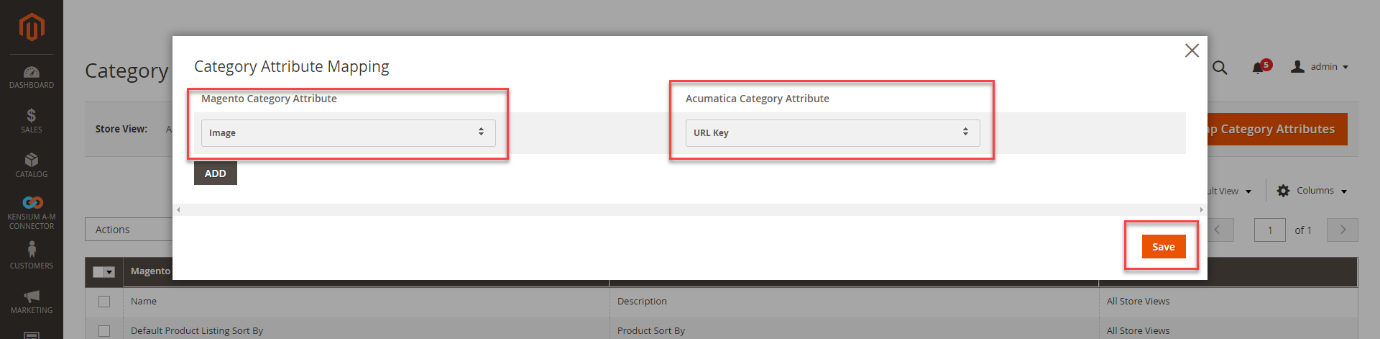
The relationship between the category attributes will be mapped.
# Mapping Customer Groups
Customer Groups in Magento can be mapped to Customer Classes and Customer Price Classes in Acumatica. To begin, navigate to the Kensium A-M Connector workspace in Magento and click Customer Group in the Mapping section. Customer groups must be mapped in order to ensure customer syncs will properly occur between Acumatica and Magento.
Select the Store View.
Click Update Customer Class.
Click Update Customer Price Class.
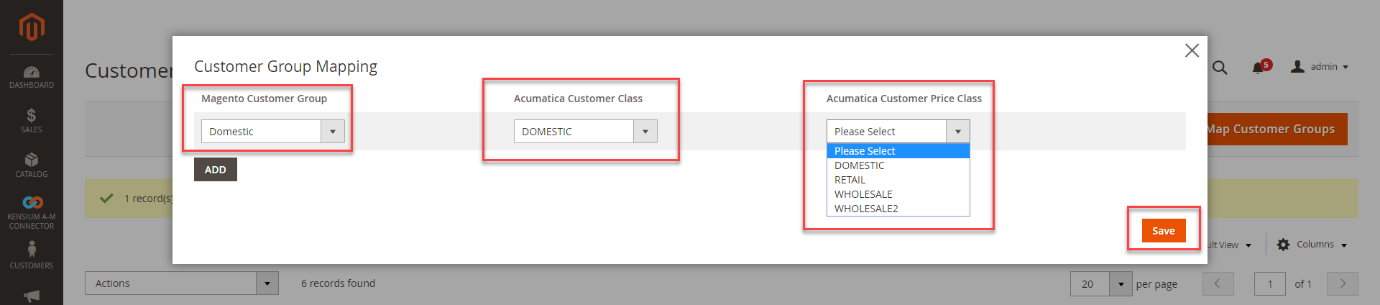
Click Map Customer Groups.
- A popup will render to create a new mapping relationship between Magento and Acumatica Customer Group data.
Select a Magento Customer Group.
Select an Acumatica Customer Class.
Select an Acumatica Customer Price Class.
- If adding multiple relationships, click Add and a second line will render to map additional relationships.
Click Save.
The relationship has been mapped.
Notes
Customer Classes and Customer Price Classes can only be used within one mapping. The connector will not recognize multiple mappings for a single customer or customer price class.
# Mapping Payment Methods
Payment methods in Magento must be mapped with payment methods in Acumatica. The purpose of this is to ensure payments are processed and settled properly from Magento to Acumatica. To begin, navigate to the Kensium A-M Connector workspace in Magento and click Payment Method in the Mapping section.
Select a Store View.
Click Update Schema.
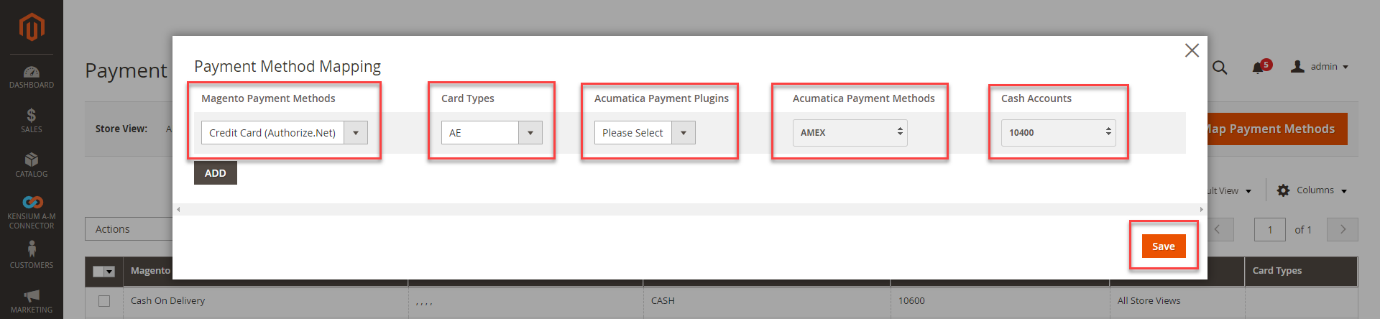
Click Map Payment Methods.
Select a Magento Payment Method.
Select a Card Type.
Select an Acumatica Payment Plugin.
- If no payment plugins are being used in the Acumatica instance, this field can be left blank.
Select an Acumatica Payment Method.
Select an Acumatica Cash Account.
Click Save.
The payment method relationship has now been mapped.
# Mapping Tax Categories
Tax class in Magento must be mapped with tax category in Acumatica. The purpose of this is to ensure taxes are processed and settled accurately from Magento to Acumatica. To begin, navigate to the A-M connector workspace in Magento and select “Tax category” under Mapping.

Click ‘Map Tax Category’ button, to map the tax class in Magento with tax category in Acumatica.
Notes:
- If we do not declare any mappings, the system will consider the configurations that are added during order sync.
- If a mapping is available, Magento will provide the appropriate tax category value to Acumatica.
- If the mapping does not exist and the syncs configuration has empty values, the order will pass null value for the product tax category, and the order sync will fail.

| Field Name | Description |
|---|---|
| Magento Tax Class | A tax class in Magento is a collection of tax rates. It specifies the tax rates that apply to the items or services. |
| Acumatica Tax Category | Tax category in Acumatica is to apply one or more tax rules to transactions based on various criteria. |
| Store View | The list of stores to which the tax class in Magento and Tax category in Acumatica are mapped. |

In order sync configuration, new fields are added such as “Taxable Tax Category” and “Non-Taxable Tax Category”.
- If the product is taxable, enter the taxable value in "Taxable Tax Category".
- If the product is non-taxable, enter the value as ‘0’ for "Non-Taxable Tax Category". Even, if you pass the value as empty, the system considers it as null and order sync will fail.
If a product's tax category in Acumatica is taxable, but in our mapping, we have Magento set to taxable and Acumatica set to exempt, then the tax category for the product will be passed as ‘Exempt’ instead of ‘Taxable’ in the order sync for the inventory.


Enter discount code and amount while setting up the tax rules.


# Order Lookup
To track orders, click order lookup and search with tax value/order id/discount amount/ of the order item(s).
The Magento website will send you an email as a notification along with a failure log report that includes information about the module and the total number of errors that were encountered.
Further, the status of the order can be translated accordingly.

# Mapping Shipping Methods
Shipping methods can be mapped bidirectionally depending on the nature of the order that has been placed.
# Shipping Methods from Acumatica to Magento
To begin, navigate to the Kensium A-M Connector workspace in Magento and select Shipping Method (A>M) under the Mapping section.
Select a Store View.
Click Update Schema.
Click Map Shipping Methods.
Select the Acumatica ShipVia method.
Select the Magento Shipping Carrier.
Enter a Magento Shipping Title.
Click Save.

The shipping relationship has been mapped.
# Shipping Methods from Magento to Acumatica
To begin, navigate to the Kensium A-M Connector workspace in Magento and select Shipping Method (M>A) under the Mapping section.
Select a Store View.
Click Update Schema.
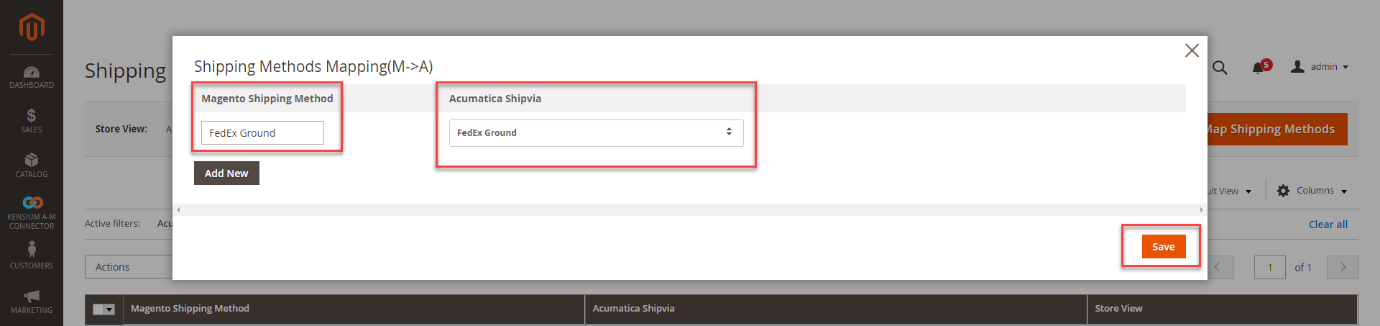
Click Map Shipping Methods.
Select a Magento Shipping Method.
- If a new method needs to be created, select Custom and enter in the name of a new Magento Shipping Method.
Select an Acumatica Ship Via method.
Click Save.
The shipping relationship has now been mapped.
# Mapping Warehouses
Warehouses in Acumatica can be mapped to Magento Sources to ensure proper management of inventory. To begin, navigate to the Kensium A-M Connector workspace in Magento and select Warehouse under the Mapping section.
Select a Store View.
Click Update Schema.
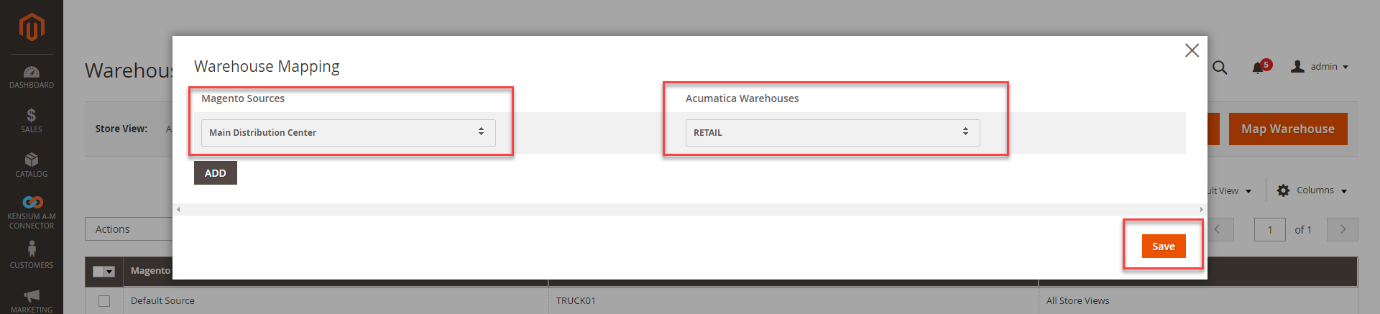
Click Map Warehouse.
Select a Magento Source.
Select an Acumatica Warehouse.
Click Save.
The warehouse relationship has been mapped.
# Mapping Order Statuses
Order statuses in Acumatica can be mapped to Magento order statuses to ensure that order status data transfers from Acumatica’s back office to Magento’s front end. To begin, navigate to the Kensium A-M Connector in Magento and click Order Status in the Mapping section.
Select a Store View.
Click Add New Order Status.
Enter the name of the Acumatica Order Status.
- The Acumatica Order Status must be entered exactly as it appears in Acumatica to ensure proper mapping.
Select a corresponding Magento Order Status.
Click Save.
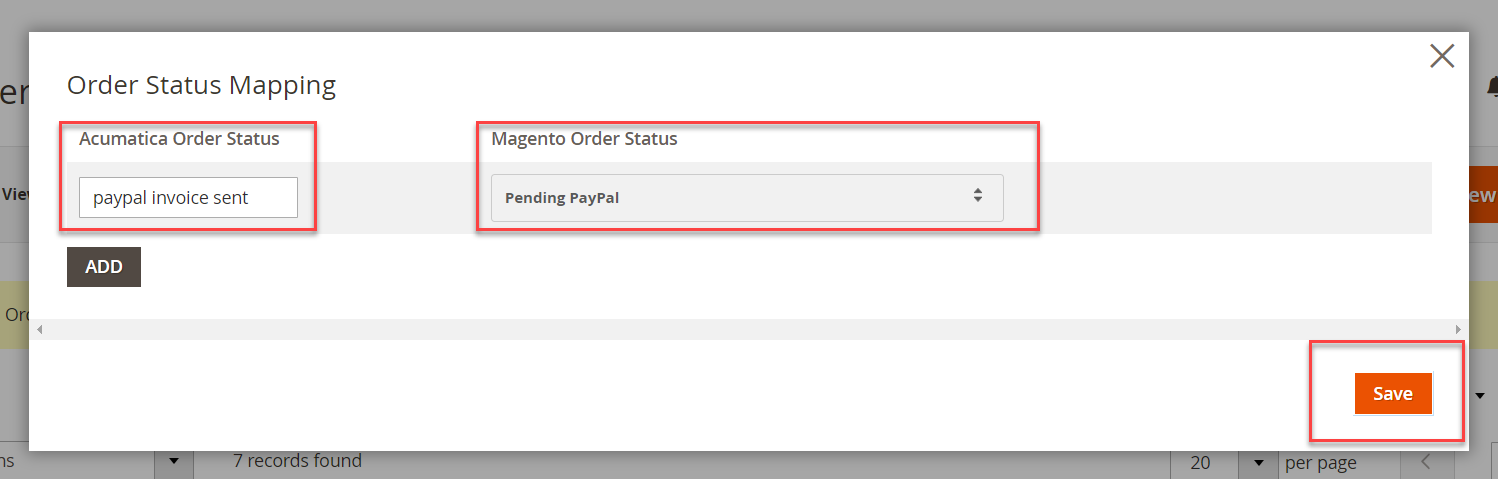
The order status is now mapped.
# Backorder feature
- For the product to be available in the front end irrespective of its stock availability in the Magento, we should create custom attribute and assign to Item class of the product in Acumatica with name "BACKORDERS".
- We need to bring this Acumatica attribute to Magento mapping screen with the below steps
- Go to Product schema screen in Acumatica under the Magento connector section.
- Under the attributes tab select the respective "BACKORDERS" attrribute and click on SAVE button.
- In Magento click on update schema in the Product attribute mapping screen.
- Map the Acumatica "BACKORDERS" attribute with Magento "BACKORDERS" field in the product attribute mapping screen.
- Once the mapping is established the Inventory sync will not touch the Stock status of those products for which the BACKORDERS is selected as [Allow Qty below 0 / Allow Qty Below 0 and Notify Customer]. By this way we can achieve the required functionality.
| Field | Value |
|---|---|
| Attribute ID | BACKORDERS |
| Attribute Name | BACKORDERS |
| Attribute Type | Combo |
| Attribute Value ID | Attribute Value Description |
|---|---|
| 0 | No Backorders |
| 1 | Allow Qty Below 0 |
| 2 | Allow Qty Below 0 and Notify Customer |